Straight Razor for Beginners
Technique and Tips
Written with barber Simon
If you visit a barbershop, you will most likely be shaved with a shavette – that is, a straight razor with replaceable sharp double-edge blades. But perhaps you want to take the step and try a traditional straight razor, where it is about more than just getting an effective shave, but above all about the feeling of taking part in a historic ritual and genuine craftsmanship? Here we go through the straight razor for beginners – what to keep in mind when it comes to care, tips and shaving technique.

It is important to keep in mind that a straight razor with a full blade (a so-called "cut-throat" or "straight razor") is not something you simply "upgrade to" from a shavette – the feel is so different since the blade is hand-forged from carbon steel, making it very different from a replaceable stainless steel razor blade. The grind is completely different, and therefore so is the experience, which can create confusion for the experienced shavette user.
You choose a shavette because you want extreme sharpness and quick efficiency – a cut-throat because you have a love for the ancient rituals surrounding this historic tool, which requires time, care and interest. That is why it is important to think through your choice of razor – it is a matter of personal taste, but also of budget and blade design. This is an exclusive tool that is meant to be your companion for life.
READ MORE ABOUT CHOOSING A STRAIGHT RAZOR
preparation: stropping
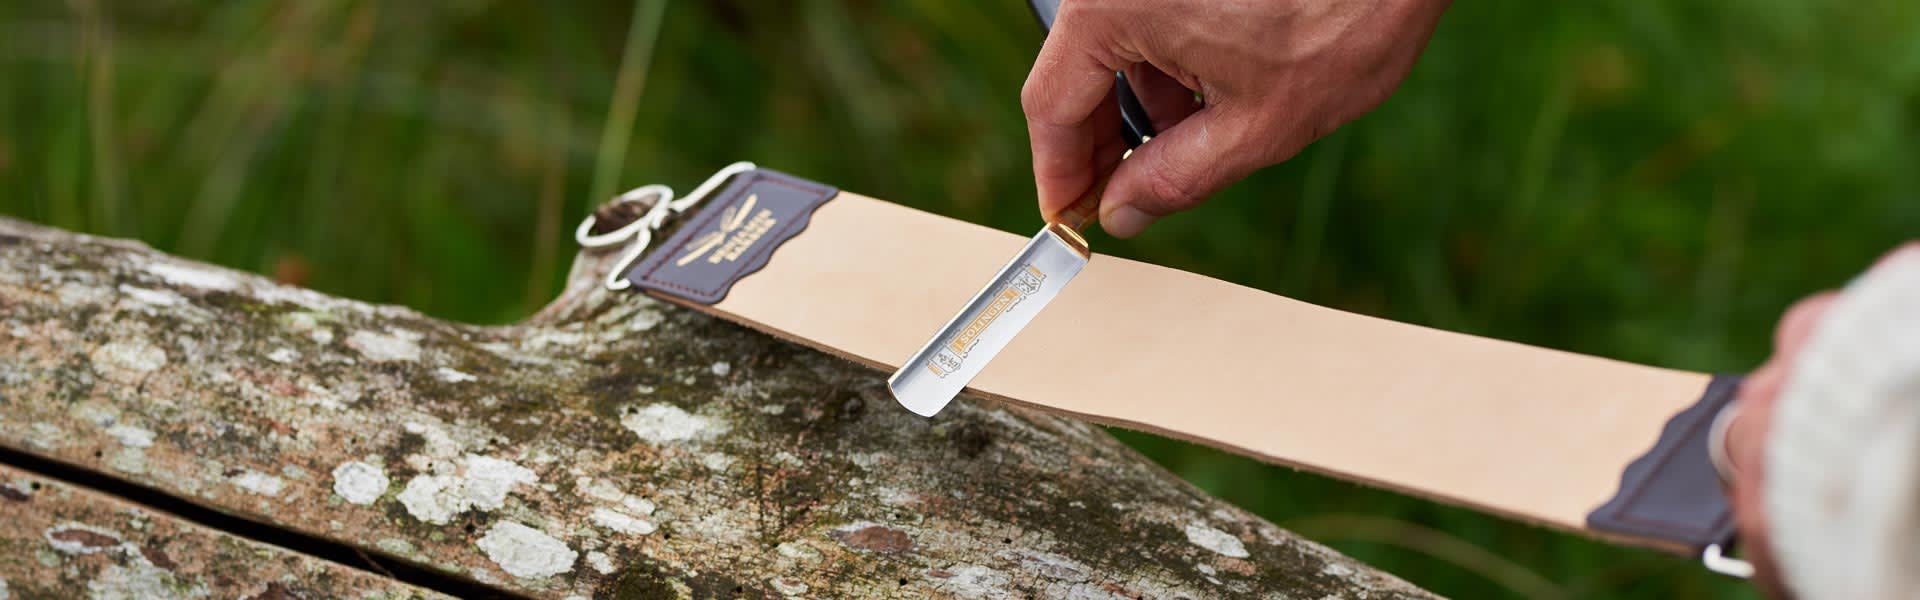
Before every shave, you should begin by running the razor over a leather strop to straighten out irregularities in the edge (think of a butcher or chef running a kitchen knife over a honing steel to achieve optimum effective sharpness). Strops come in different varieties, but the leather often comes from cow, buffalo or calf. Decide whether you want a single-sided strop or a double-sided one with canvas on one side. In the latter case, use the rough side first (canvas) and then finish with the leather side. If you have a single-sided strop, use the smooth side, which is the leather side.
The first time you use the strop and then from time to time afterwards, you should apply a little leather conditioner/strop paste and spread it out with your hand or a cloth. This prevents the strop from drying out and cracking and also provides better glide during stropping. Watch out for nicks or scratches in the leather – if they cannot be removed, you should consider getting a new one, since grooves can otherwise damage the razor blade!
There are both narrow and wide strops, and the wider XL variants are popular, not least among beginners, since they cover the entire width of the blade without you having to overlap your strokes. In other words, it is easier to get a more even result and simpler technically. Narrower strops are often cheaper, though.
-
 GentsCowhide Razor Strop£38.50£55-30%Lowest price in the last 30 days: £38.50
 -
 Benjamin BarberLeather Balm£4.25£8.50-50%Lowest price in the last 30 days: £4.25
 -
 OthersRazor Strop in buffalo hide and cotton - Retro Collection£34£68-50%Lowest price in the last 30 days: £34
 -
 Benjamin BarberRazor Strop in leather and canvasBlack£155
One end of the strop usually has a ring that you can attach to, for example, a door handle or a hook, while you keep the strop stretched out using the handle at the other end. Hold the razor with your thumb and index finger while holding the strop taut with your other hand. Place the razor down with the cutting edge facing you while pulling it away from you over the strop. Then turn the razor over and pull it back toward you, but now with the edge facing away. Do not rush at first; instead, focus on carrying out the procedure correctly with an even motion and a relaxed hand. Make sure the razor does not catch and puncture the leather. Repeat 15–20 times on each side and finish by wiping the strop clean.
See how to do it here!
preparation: preparing the face
The ideal setting is a warm and humid bathroom, and many choose to take a hot shower before shaving while also cleansing the face. Otherwise, you can wet your face with warm water after cleansing. Do not dry your face; let it remain damp. Alternatively, moisten a towel with warm water and place it over your face. Feel free to apply a pre-shave product in the form of shaving oil directly onto the warm, damp skin – do not rinse it off, just leave it on.


The next step is to work up a creamy lather in the form of a shaving cream or shaving soap, which you apply using a shaving brush (you can lather cream with your fingers as well, although the result is better with a brush because of the friction and the fact that the hairs are lifted more easily). Wet the brush in warm water, lather up the cream or soap, and apply with circular motions. Let the lather sit on the skin for a while before you begin shaving.


MORE ABOUT HOW TO PREPARE THE SKIN BEFORE SHAVING
shaving procedure
#1. Stretch the skin with your other hand while holding the razor with a firm grip, but without tensing your wrist.
#2. Angle the razor blade to about 30–35 degrees. Begin by going over all areas with the grain. Start with the cheeks – this is the largest area and therefore easier to shave clean, while the hairs there are not as tough and demanding on the blade.
#3. Then continue with the chin, which is the most difficult part of the face to master. Stretch the skin on both sides of the jaw at the same time using your middle finger and thumb. Study which direction the hairs grow. The area around the chin and under the mouth is tricky because it can be hard to reach, and in places such as below the lower lip it can sometimes be difficult to shave with the grain; many people instead shave upward there, that is, directly against the grain. As for the area above the upper lip, it is usually tough to get completely clean-shaven, so do not be tempted to press too hard.
NOTE! Avoid going over the same area several times in the same direction – this can cause irritation and redness. Use short strokes, about one centimetre long. Apply fresh lather during the shave whenever you feel it is needed.
#4. Apply lather to the neck if it has started to dry. The skin is thinnest here, so the risk of irritation or cuts is greatest. The neck is also the trickiest area when it comes to the complicated direction of hair growth (although this is, of course, individual).
#5. Now repeat all the procedures again over the face and neck with fresh lather and shave against the grain. This is the step where the shave has the greatest effect. A few people with very sensitive skin may, however, need to skip this step and shave only with the grain.
Do not forget to finish by rinsing your face with cold or lukewarm water (this is also when you will see if you missed any hairs), and then apply an aftershave balm or aftershave gel to moisturise and soothe the skin.
NOTE! Carbon steel is not stainless, which means you must be careful to wipe the razor blade clean of lather, moisture and hair residue afterwards – it is a good idea to finish by applying a little oil to the blade.
Once a year or so, you should also hone your straight razor – however, this requires many years of practice with sharpening stones, and it is recommended that you leave your razor to a professional in the field, that is, unless you know one hundred percent how to do it yourself. Note, however, that it must be someone with specific experience of straight razors – taking it to the ordinary local knife sharpener around the corner is not recommended. If you want to try learning how to hone, a good tip is to buy a few cheap second-hand razors to practise on rather than sacrificing your valuable thousand-krona razor.
If you want additional tips, do not forget to check out our guidebook on beard care and shaving, which, among many other things, covers all aspects of the fine art of shaving!